
Everything you need to know about binding-off brioche knitting. Four easy methods.
Finishing your brioche stitch project couldn’t be easier. If you are expecting any fancy methods, I have to disappoint you. Basically, you can apply any standard bind-off technique if you observe a couple of easy tricks. Still, some techniques will look neater than others. So I want to focus on the four most popular methods here.
Let’s dive right into it!
Note: I earn a small commission for purchases made through links in this article.
Instructions: How to bind-off brioche knitting

This technique works the same, no matter if you are knitting the brioche stitch flat or in the round. If you are doing the brioche stitch in two colors, it's recommended to bind off using the main color (mc).
Instructions
- Start by reading your knitting. Your project might start with a different selvage. Basically you will have to knit all stitches as they appear. You will knit all double stitches together as usual, but instead of "slip one & yarn over" you will knit those stitches.

- Knit your selvage stitch as normal.

- Knit the double stitch together (so a normal brk).

- Pass the second stitch on your right needle over the first one. Just like when you would do a normal bind-off.

- Knit another stitch. Do not add a yarn over.

- Pass the new second stitch on your right needle over the first one.

- Knit the next double stitch together (so another brk).

- Pass the (new) second stitch on your right needle over the first stitch again.

- Repeat steps 5-8 until the end of the row.

Notes
This bind-off technique will create a rather tight edge. Perfect for all projects where you don't want the edge to wear out or flare. To achieve a slightly stretchier edge, you can use a needle one or two sizes smaller and bind-off a bit more loosely. For further options, see below.


Method 2: In-pattern bind-off

If you look very closely at your brioche stitch pattern, you will see that it more or less resembles a 1×1 rib stitch. There are always columns of knit stitch “Vs”, followed by columns with purl stitch bumps. As a result, you can also opt to bind-off in pattern. The technique will be almost exactly the same.
The only difference compared to the instructions above is that you will purl all stitches that have a double purl bump at their base.

Step 1: Start by knitting the selvage stitch and k2tog the first double stitch.

Note: If you are pattern starts with a different selvage, then knit those stitches as they appear.
Step 2: Pass the second stitch on your right needle over the first one. Just like you did before.

Step 3: Purl one stitch. Again, this should be a stitch that you would normally SL1 & yarn over in brioche knitting.

Step 4: Pass the (new) second stitch on the right needle over the first one.

Step 5: Knit the next double stitch together and continue to bind-off in this manner.

Again, your project might start a bit differently. The key here is only that you knit the double stitches and purl the single stitches. So you will have to read your knitting. The resulting edge will not be drastically different. The only thing that will change is the stitch that sits right below the edge (and is typically not very visible).
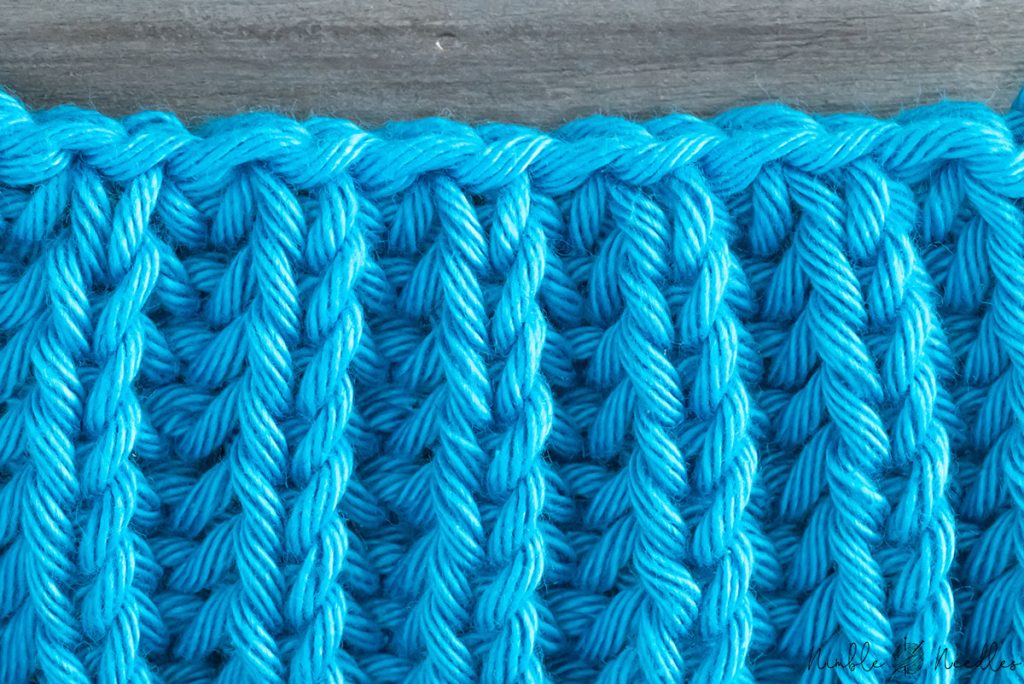
However, I do feel that the in-pattern edge is a bit straighter and neater. So, I actually would recommend it, even if you do not care about that little hidden bump..
Method #3: Stretchy bind-off for the brioche stitch

Now, here’s the issue with the standard bind-off: The brioche stitch is basically a form of double knitting. By using a bind-off for normal flat knitting, you are creating an edge that is only half as stretchy as the rest of your fabric. If your project benefits from a bit more give, I recommend adjusting the repeat even further.
Step 1: Knit two stitches in-pattern (so k2tog all double stitches and purl all single stitches).

Step 2: Insert your left needle into both stitches one more time to knit them together through the back loop (k2tog tbl) as follows.

Step 3: Wrap the working yarn around the needle counterclockwise.

Step 4: Pull the yarn through both stitches.

Step 5: Drop both loops off the left needle.

Step 6: Knit another stitch according to your pattern and repeat steps 2-5.

So, basically this is nothing else but the in-pattern bind-off. But instead of passing over, you knit the stitches together through the back loop. This, of course, will add one more stitch in between and thus lead to quite a bit more stretchiness.
Method #4: The Italian Bind-Off

For a super invisible and very stretchy edge, you can also use the tubular or Italian Bind-off to finish your brioche knitting. While it requires a tapestry needle, and that can be annoying if it’s a long edge, it’s definitely worth it!
Break your yarn and leave a tail that is around 4 times as long as your project is wide and thread it on a blunt tapestry needle.
Step 1: Read your knitting. My swatch starts with a selvage stitch. You might use a different selvage. The key is to treat the selvage stitches as if they continued your regular brioche project. In this case, the first true brioche stitch is the second stitch. This was the result of Sl1&yo. As a result, I will treat my single garter stitch selvage as “purl” stitch.

Step 2: Insert your tapestry needle into the first stitch knitwise and pull the yarn through.

Step 3: Insert your tapestry needle into the second stitch purlwise. Go through both loops of the double stitch.

Step 4: Pull the yarn through the first stitch purlwise and drop the stitch off the needles.

Step 5: Pull the tapestry needle through the second stitch on your needle knitwise, coming in from behind. Try not to split the yarn.

Step 6: Go into the first stitch knitwise and drop the stitch off the needles.

Step 7: Pull the yarn through the second stitch purlwise.

Step 8: Repeat steps 2-7

Important: If your pattern starts with a different stitch, the repeat actually doesn’t really change. You simply switch up steps 1+2. And then you read your knitting. If the stitch on your needle is a double stitch, you simply do steps 6+7 first. Then, do steps 4+5 and repeat in that order.
In a way, this is nothing else but a Kitchener Stitch done on one needle. You could easily slip all double stitches to one needle and the single stitches to another spare needle and follow the maybe a little bit more familiar rhythm of that grafting method.
Please note that this edge is not fully reversible. The wrong side will typically look a little bit less neat, and you will have little “floats” between the ridges that can be a bit visible – especially when done in two colors.

It’s not entirely horrible, but I would probably not use it for a project that is meant to be reversible. However, the edge is very stretchy. So it could be perfect for a hat where the inside will typically not be seen.
Anyway, that’s how to bind off the brioche stitch. Comment below if you still have any questions.
