
A step-by-step tutorial on fixing an edge stitch in knitting; two different methods
You probably already know how to fix a dropped stitch in knitting using a crochet hook. Contrary to what you might think, you can use a very similar method to fix a dropped edge stitch as well. It’s almost as simple and just as fast. So fear not, your project is safe!
Let me show you how!
Note: I earn a small commission for purchases made through links in this article.
Instructions: How to fix a dropped edge stitch
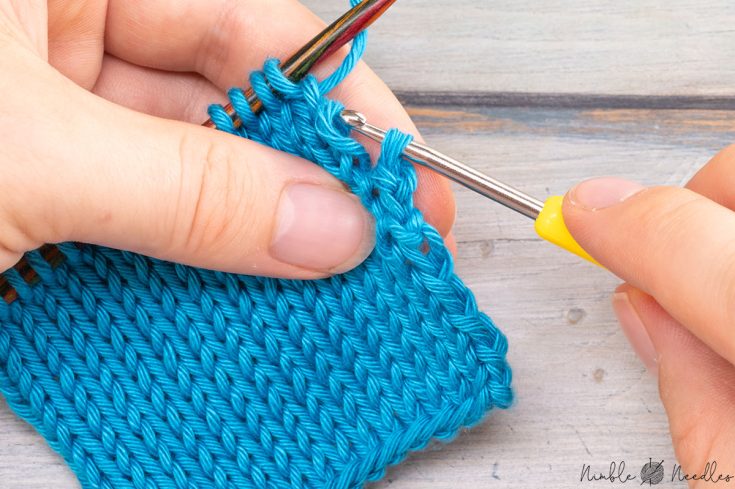
The basic idea behind fixing a dropped edge stitch is not very different from fixing any other stitch. There is only one difference: You need to go through each loop twice. This method works very well for stockinette stitch edges.
Tools
- A crochet hook in a similar size.
Instructions
- (optional): Stretch out all the dropped loops a little bit to the side lightly (except the first one). Sometimes the adjacent stitches steal a bit of yarn from these loops, and this is to ensure everything looks nice and neat again.

- Use your crochet hook and enter the first loop from the front, making sure you do not twist it.

- Grab the lower part of the loop directly above it from above.

- And pull it through with a slight clockwise twist. Don't pull the whole loop through. Only enough to form a stitch

- Twist the crochet hook with the loop around clockwise even further and go underneath the upper part of the loop.
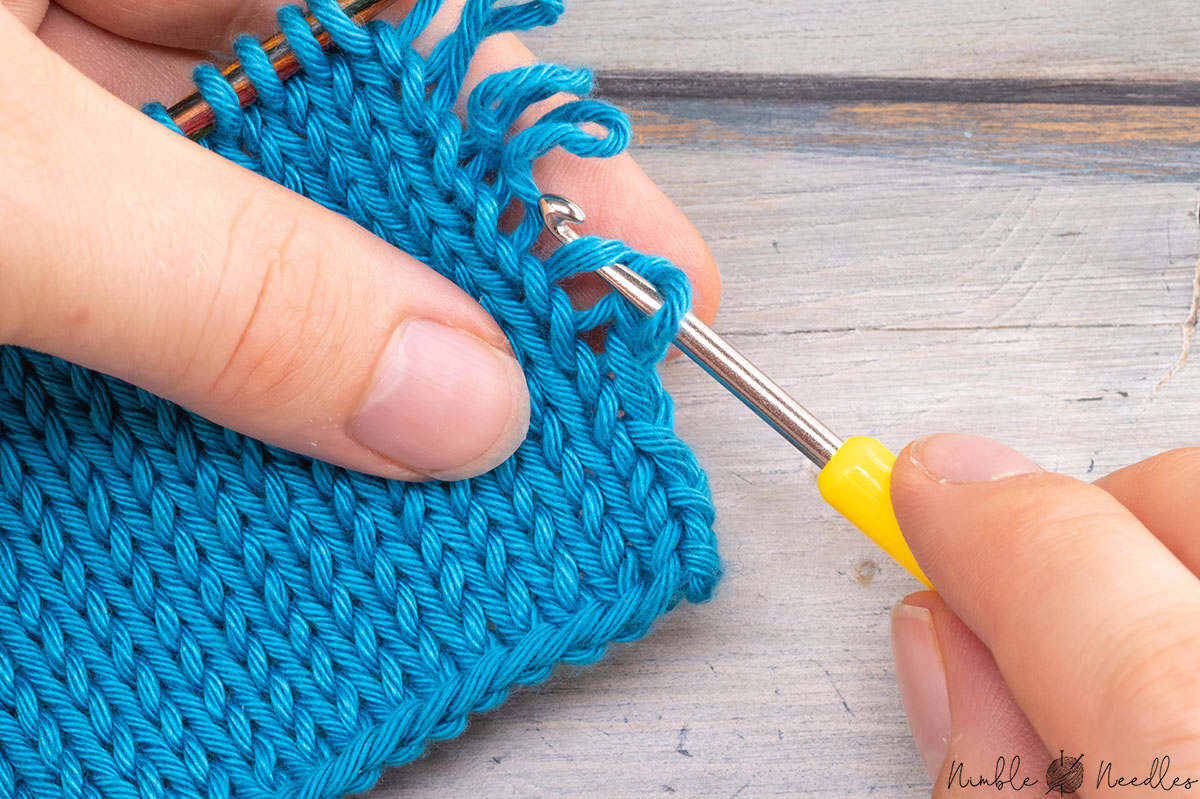
- Pull the upper part of the loop through counter-clockwise.

- Twist the crochet hook back clockwise and repeat steps 3-6.

- Finish by grabbing the working yarn and pull it through the last edge stitch as if to knit. Then slip the stitch back to your knitting needle.
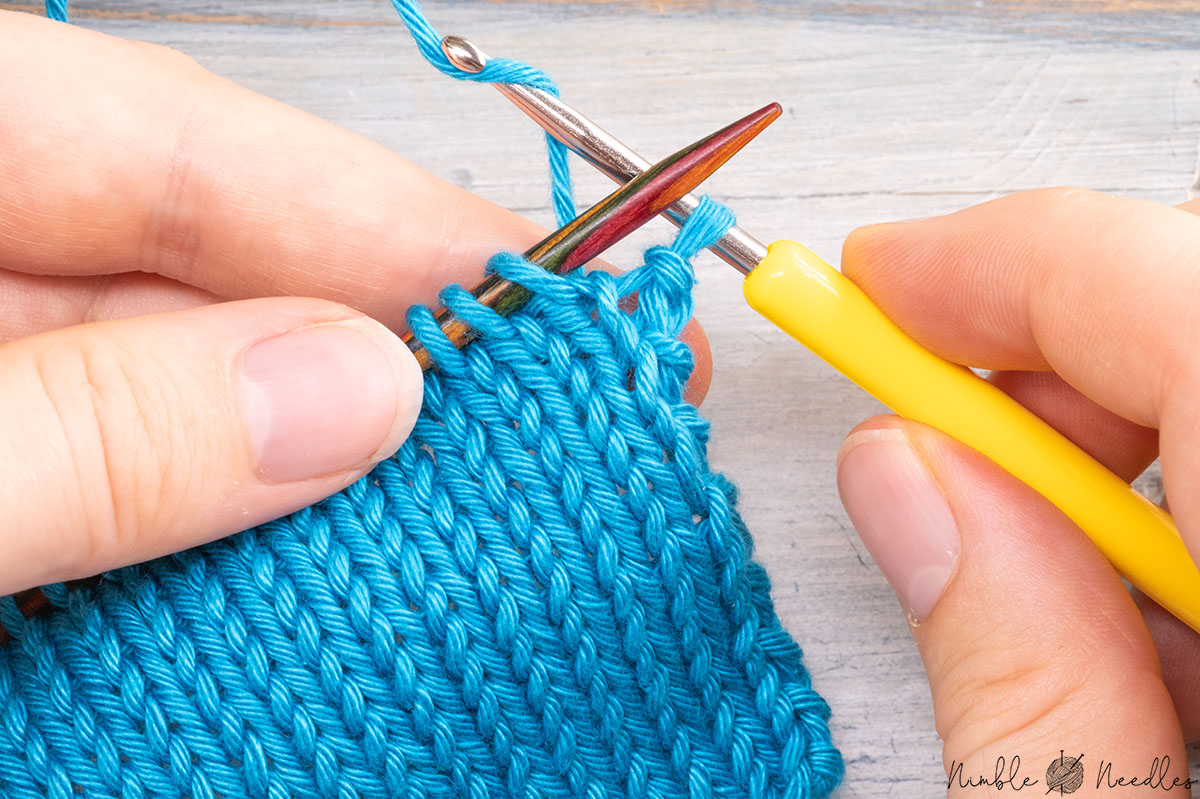
How to fix a dropped slip stitch selvage
A lot of patterns feature slip stitch selvage (click here for a list of edge stitches). These are even easier to fix. Why? Well, think about it. A normal edge stitch is unique. You have to have stitches stacked upon each other that are directly connected. That’s why the loops you create when dropping a stitch are so long. That’s why you go into these loops twice.
But with a slip stitch selvage, you only work the edge stitches in every odd row. So, fixing them is very simple.
Step 1: Enter the lowest dropped stitch from the front without twisting the stitch.

Step 2: Grab the loop directly above.

Step 3: Pull the loop through with a light counter-clockwise twist.

Step 4: Twist the loop back clockwise and repeat steps 2-3.

Please pay attention: There are a gazillion different slip stitch selvage. This method only works for the most basic version, where you:
- RS: Slip one purlwise with yarn in back….knit the last stitch
- WS: Slip one purlwise with yarn in front….purl the last stitch
If you use a different selvage stitch, you have to figure it out yourself. A simple and common variation is the twisted slip stitch selvage. Here, you simply enter the loop through the back loop and twist it around before you grab the loop above. Then, you do the exact same thing before you fix the next stitch. You quickly let go of the stitch, and re-enter it through the back loop to twist it around, etc.
But again, there are so many variations that it would be impossible to cover them all here. If everything fails, you can always carefully tink back a couple of rows and fix it the ordinary way by knitting that section one more time. While it might be tedious, it can be the smarter choice for a beginner. After all, yours wouldn’t be the first mistake that started small but ended up bigger and bigger simply because more and more sections of your knitting unraveled because you didn’t know what you had to do.
Anyway, that’s how to fix an edge stitch. Comment below if you still have any questions.
Very handy trick! But I’m confused. Directions in video slightly different from written instruction. Written instruction says to enter loop from the back for first stitch, then from the front of same loop for second stitch in the loop. The other shows to enter from front to form both stitches from the single loop. Which is correct?
uh? Step 2 says “enter from the front”. What are you referrring to?
Love your tutorials. Easy to follow and learn from.
I’ve never been able to fix a dropped stitch correctly; but your clear explanation of what has to be done, your step-by-step instructions, and your excellent photographs have solved that problem for me. Thank you so much for this post and for all of the posts and patterns you’ve shared with knitters everywhere!
Thanks for the great clear pictures. Your tutorial looks very clear and concise. I am definitely saving this tutorial for future use.